Upgrading the ASUS TP500 to a FHD (1920x1080) IPS Screen
The Asus TP500LA is a 15.6-inch touchscreen laptop that offers a versatile computing experience. It features a 360-degree hinge design, allowing the display to be folded back to convert the laptop into a tablet or used in various other modes, making it suitable for both traditional laptop tasks and touch-based applications.
One significant drawback of this laptop is the screen. The factory installed 1366×768 TN panel comes with bad viewing angles, washed out colours and awful UI scaling. In productivity and reading tasks the text looks noticeably blurry and combined with the compromised viewing angles you may find yourself wanting to upgrade to a better display if you don’t have an external monitor on hand.
What are the options?
The first thing to note is that the Asus TP500 series uses the LVDS (Low-Voltage Differential Signaling) technology to drive its internal display. Depending on the configuration LVDS may be used in single or dual channel mode. The biggest difference is the amount of available bandwidth which in turn has an impact on the support of higher resolutions or refresh rates.
The default configuration on the Asus TP500 is single channel LVDS limiting it to 40pin LVDS displays with a maximum resolution of 1366×768 pixels. For those who would like to upgrade to a FHD 1920×1080 panel this is major problem. If you are only looking for better viewing angles and decent colours you may use a 40 pin LVDS IPS display (still limited to 1366×768 pixels in resolution).
Now this brings up the question whether it is even possible to upgrade the Asus TP500 to a FHD screen. After a lot of research, surfing eBay and studying the schematic of the TP500 mainboard I determined that it’s indeed possible to upgrade the screen!
The way it works is by modifying the mainboard circuitry to use the eDP (embedded Display Port) technology instead of LVDS. All Intel Laptops of the Haswell/Broadwell generation (and probably later) use eDP to connect the iGPU to the internal display. The engineers at Asus decided to convert the eDP signal from the iGPU into an LVDS signal by using the ANALOGIX ANX1121 chip which then drives the internal display. I am not sure why this choice was made but my guess is that LVDS displays were cheaper than eDP displays when this laptop was released to the market. Fortunately, Asus designed the circuit board in a way that it can be configured with LVDS or eDP depending on which components are installed. The goal is to modify the board so that the iGPU directly drives the display without going through the LVDS conversion first. This enables the use of most 30 pin eDP displays available on the market, such as FHD IPS panels which is what I was aiming for in my case.
Finally, it is not a simple or straightforward procedure, but it can be achieved with the appropriate tools and expertise in micro soldering. Additionally, a new display cable is also required, the part number is Asus 14005-01290000. It can usually be found on eBay or Aliexpress for around 10€.
Disclaimer: All information and advice provided here is for informational purposes only. Any action you take based on the information provided is at your own risk. I am not responsible for any consequences or damages resulting from your use of this information. It is recommended that you seek professional advice or consult with the appropriate experts for specific situations or concerns.
The Modification
The first step is to remove the motherboard from the laptop. I won’t go into any details on how to accomplish that but you may find this guide by iFixIt helpful. Instructions on how to exchange the screen itself may be found on YouTube using teardown or screen replacement videos. Just make sure to also run the new display cable through the “conduit” between the shell and screen assembly.
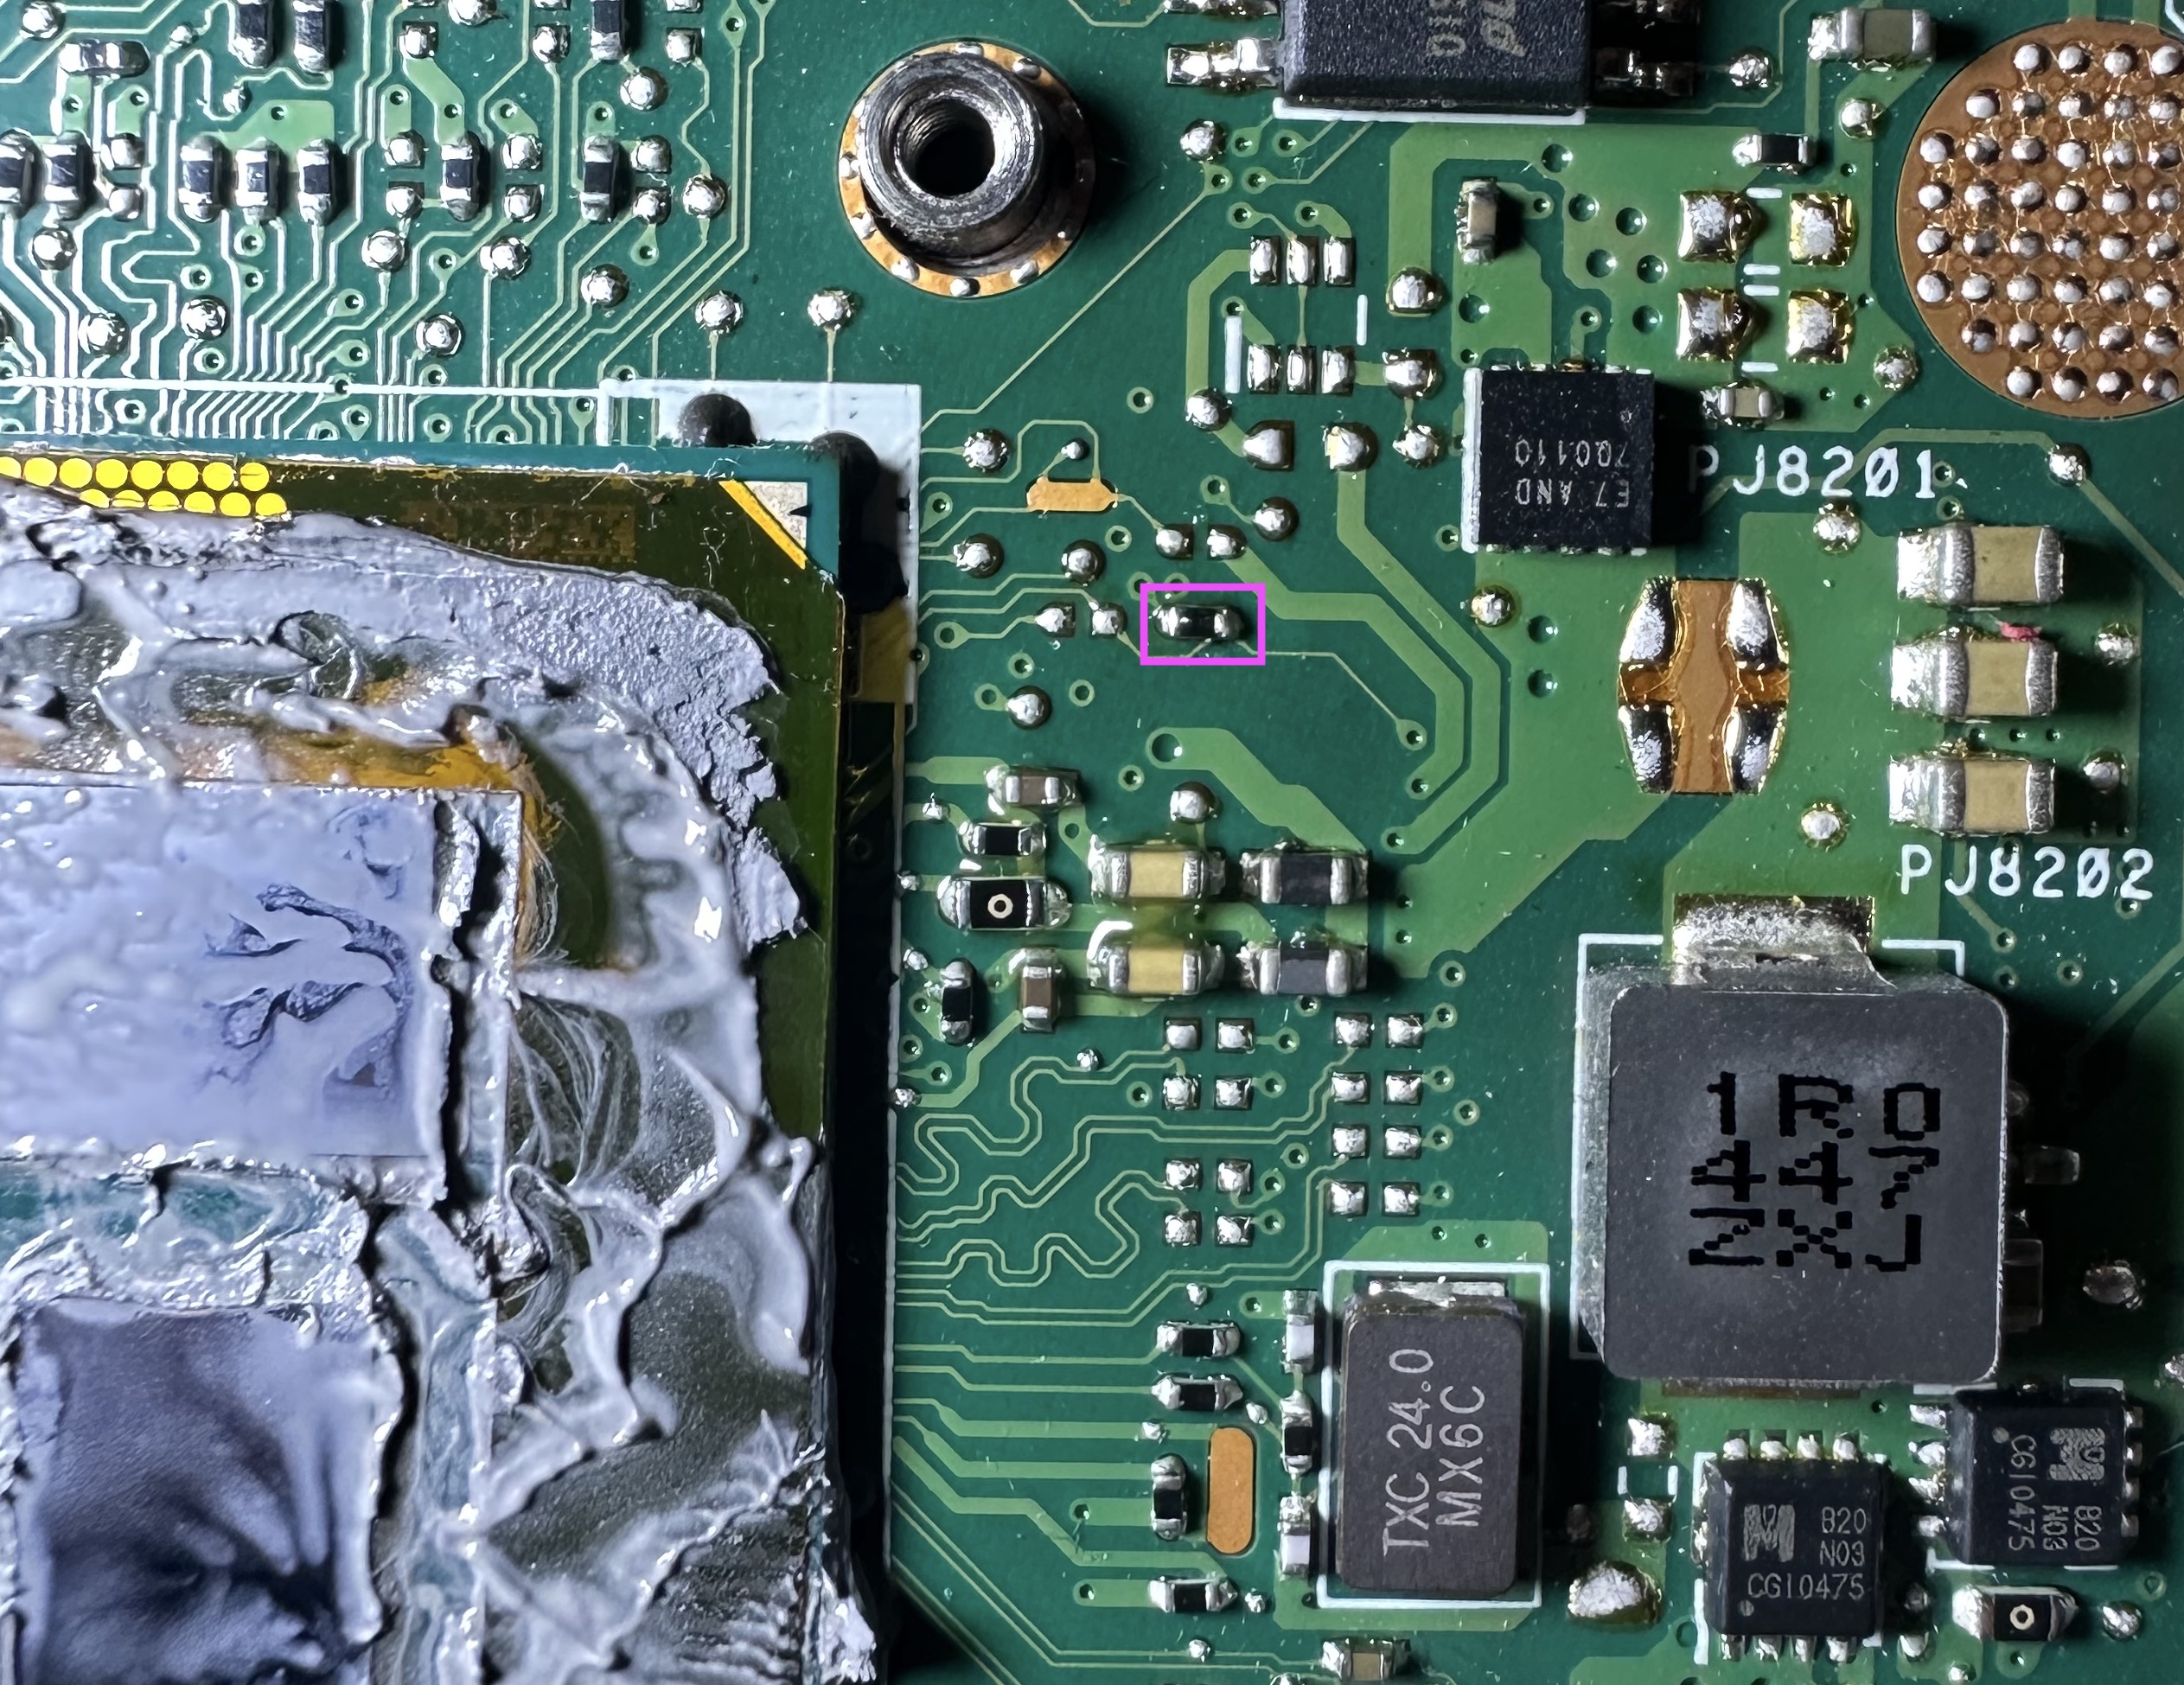
The first area of interest is on the top side (the side with the CPU on it) near the screen connector. It can easily be identified by the ANALOGIX and NS892415 chips.
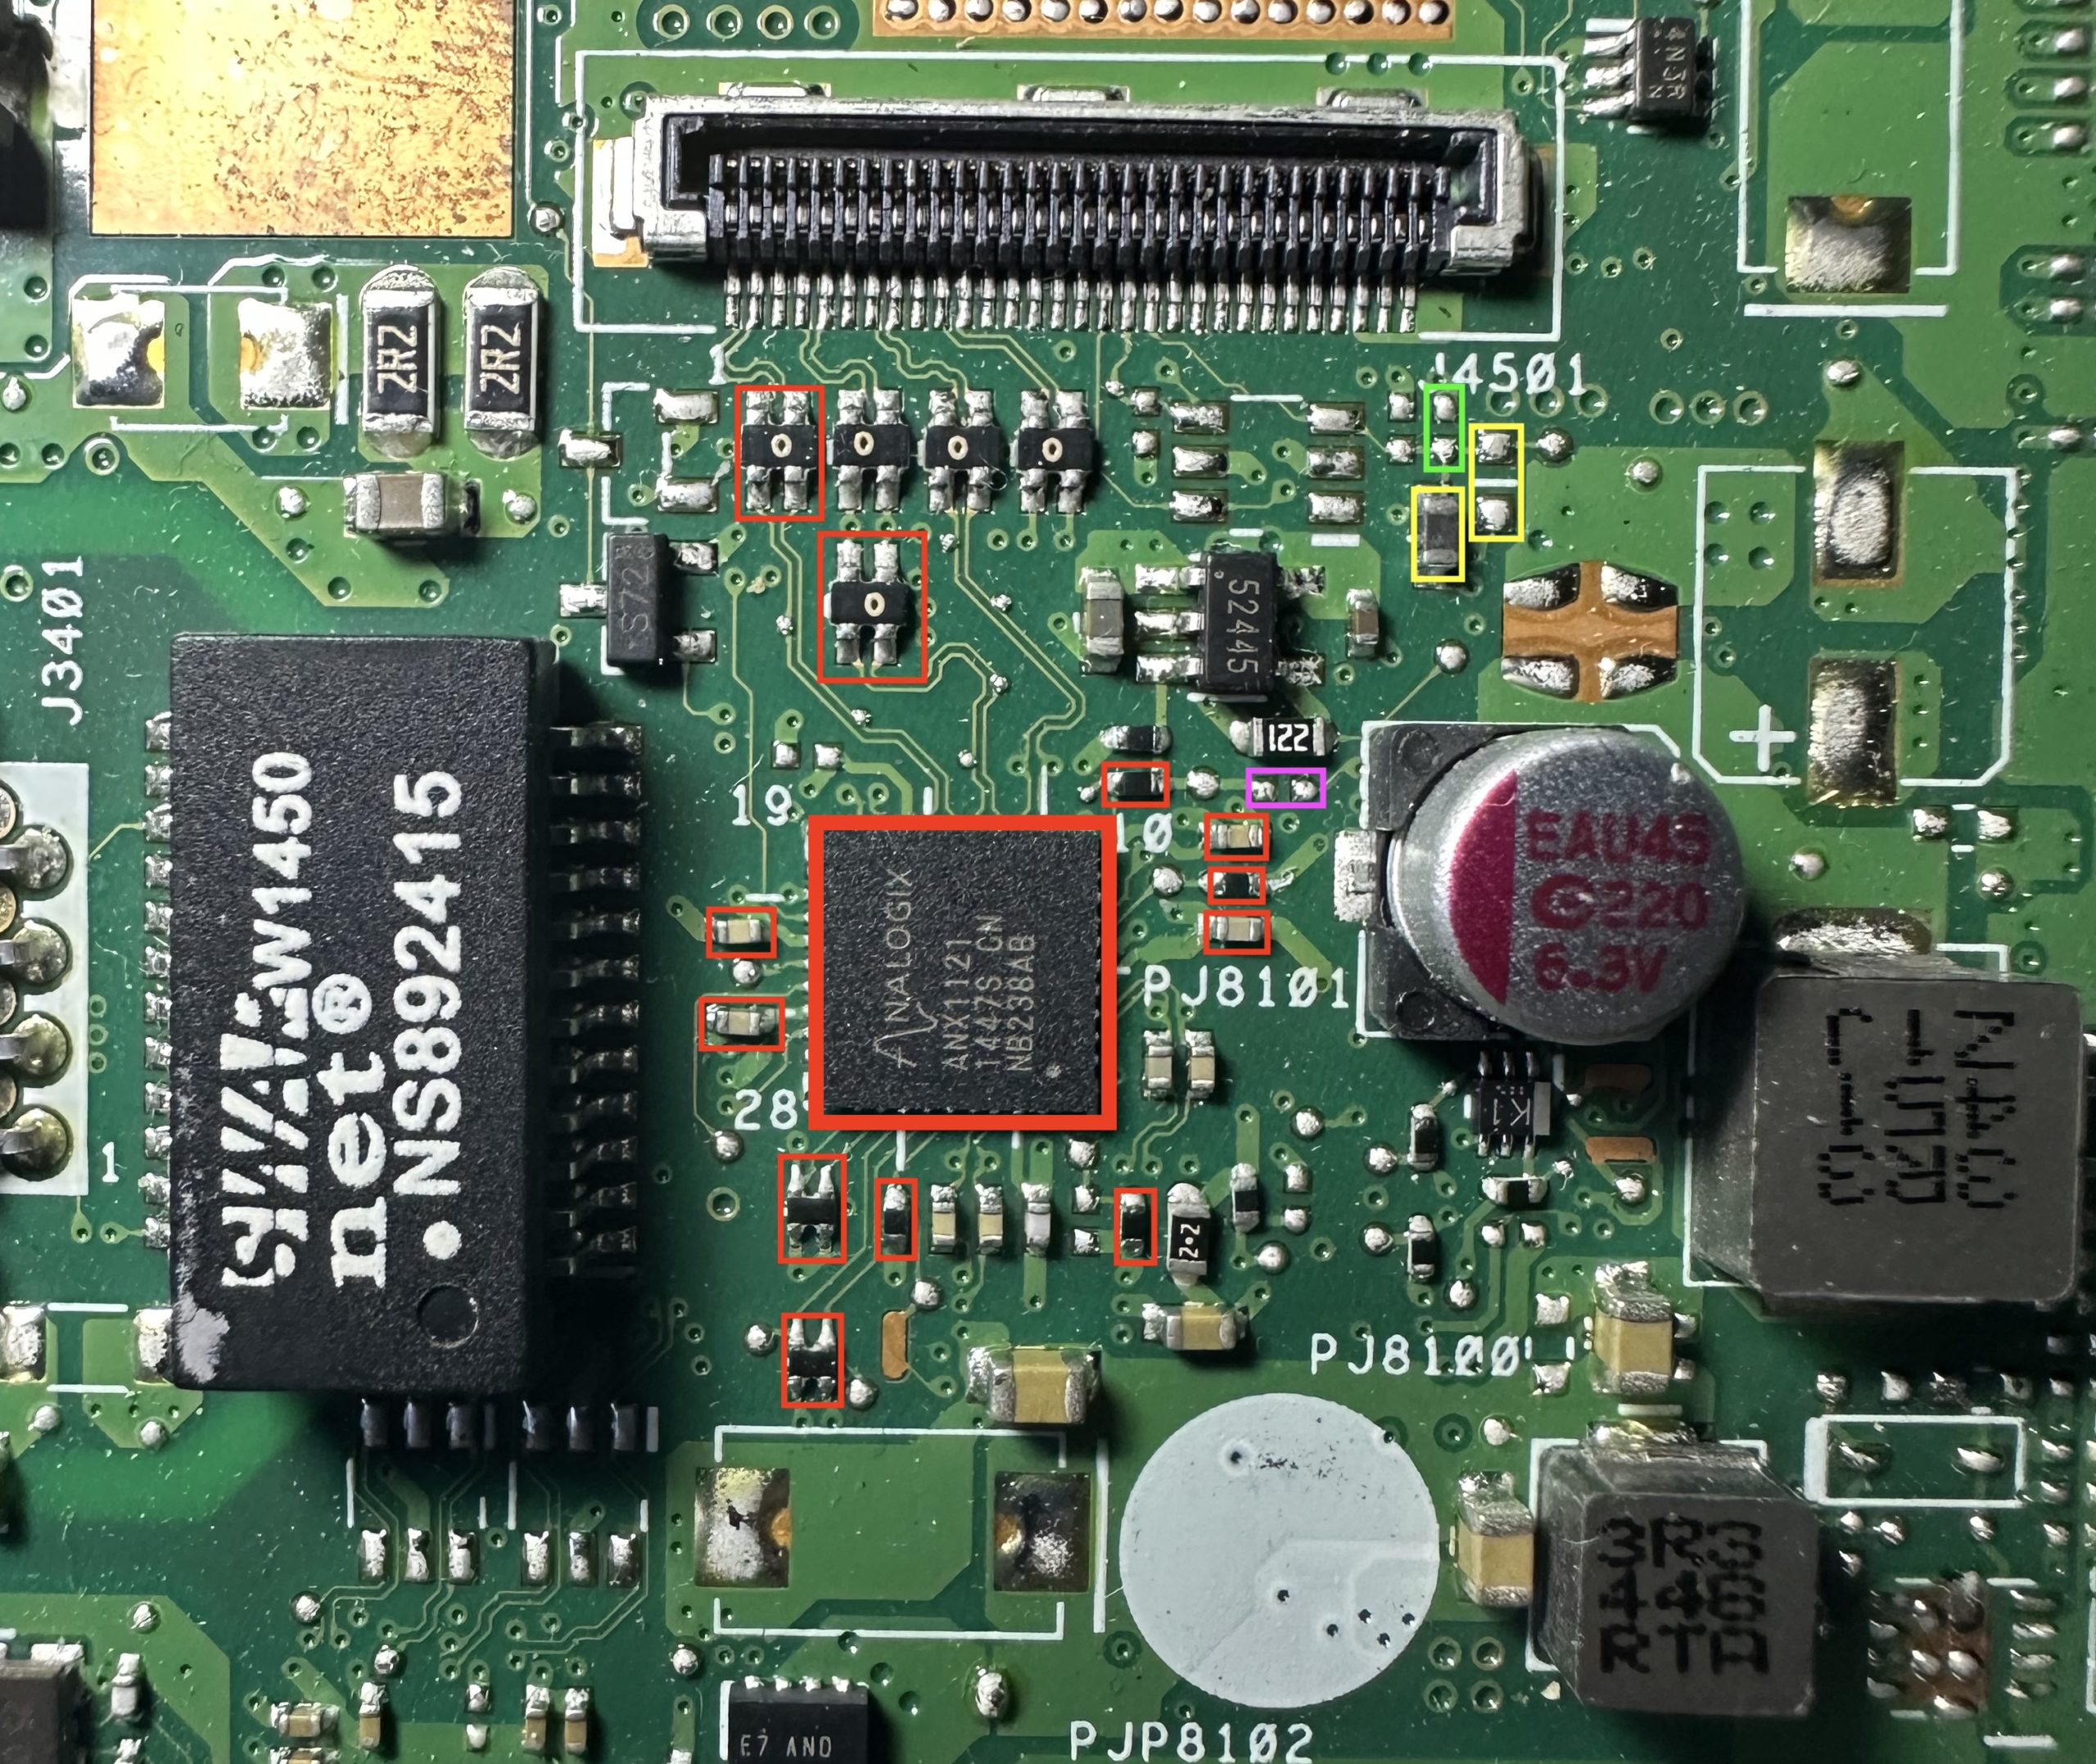
All components outlined in red must be removed. The component outlined in yellow needs to be swapped to the empty pads next to it to allow for the backlight control circuitry to work. Additionally, a 10k 0402 SMD resistor needs to be installed on the pads outlined in green. The pads outlined in pink have to be bridged with a 0 Ohm 0402 SMD resistor.
Once all the changes have been applied the area should look like this:
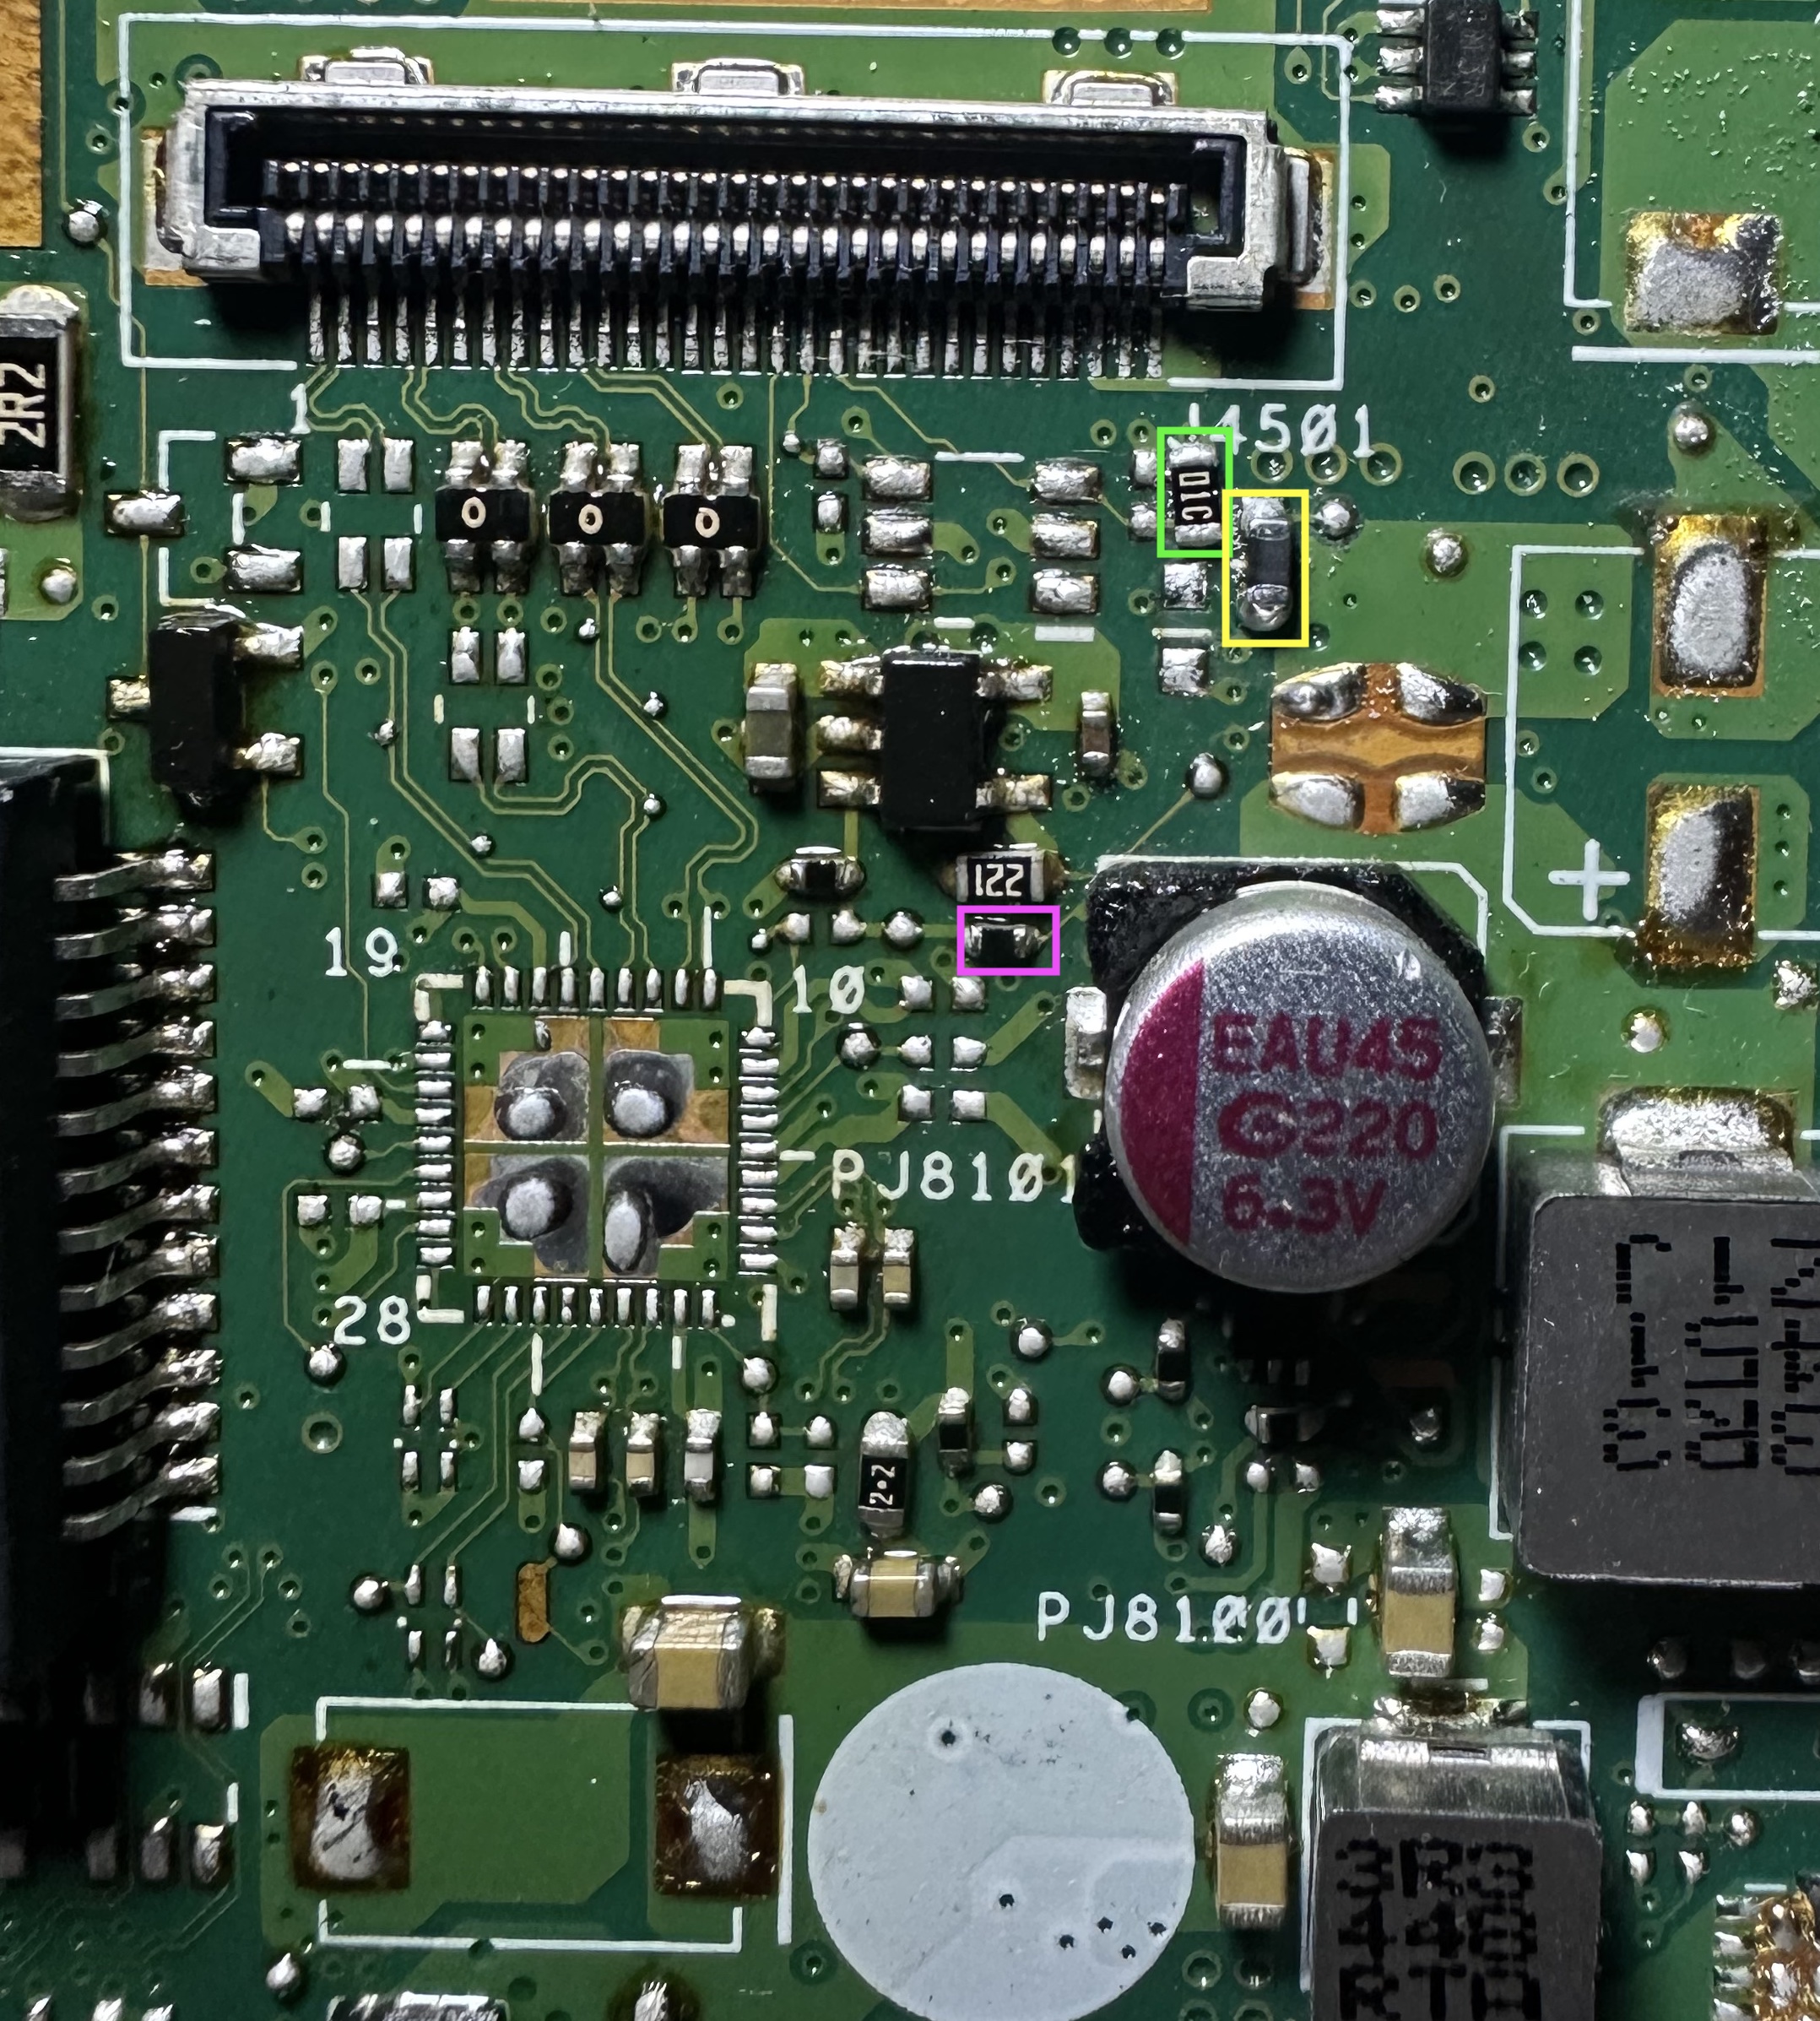
Note that the swapped component (yellow) and the additional components (green and pink) are outlined again.
The next area of interest is near the CPU. You will have to remove the CPU cooler in order to gain access to components underneath it.
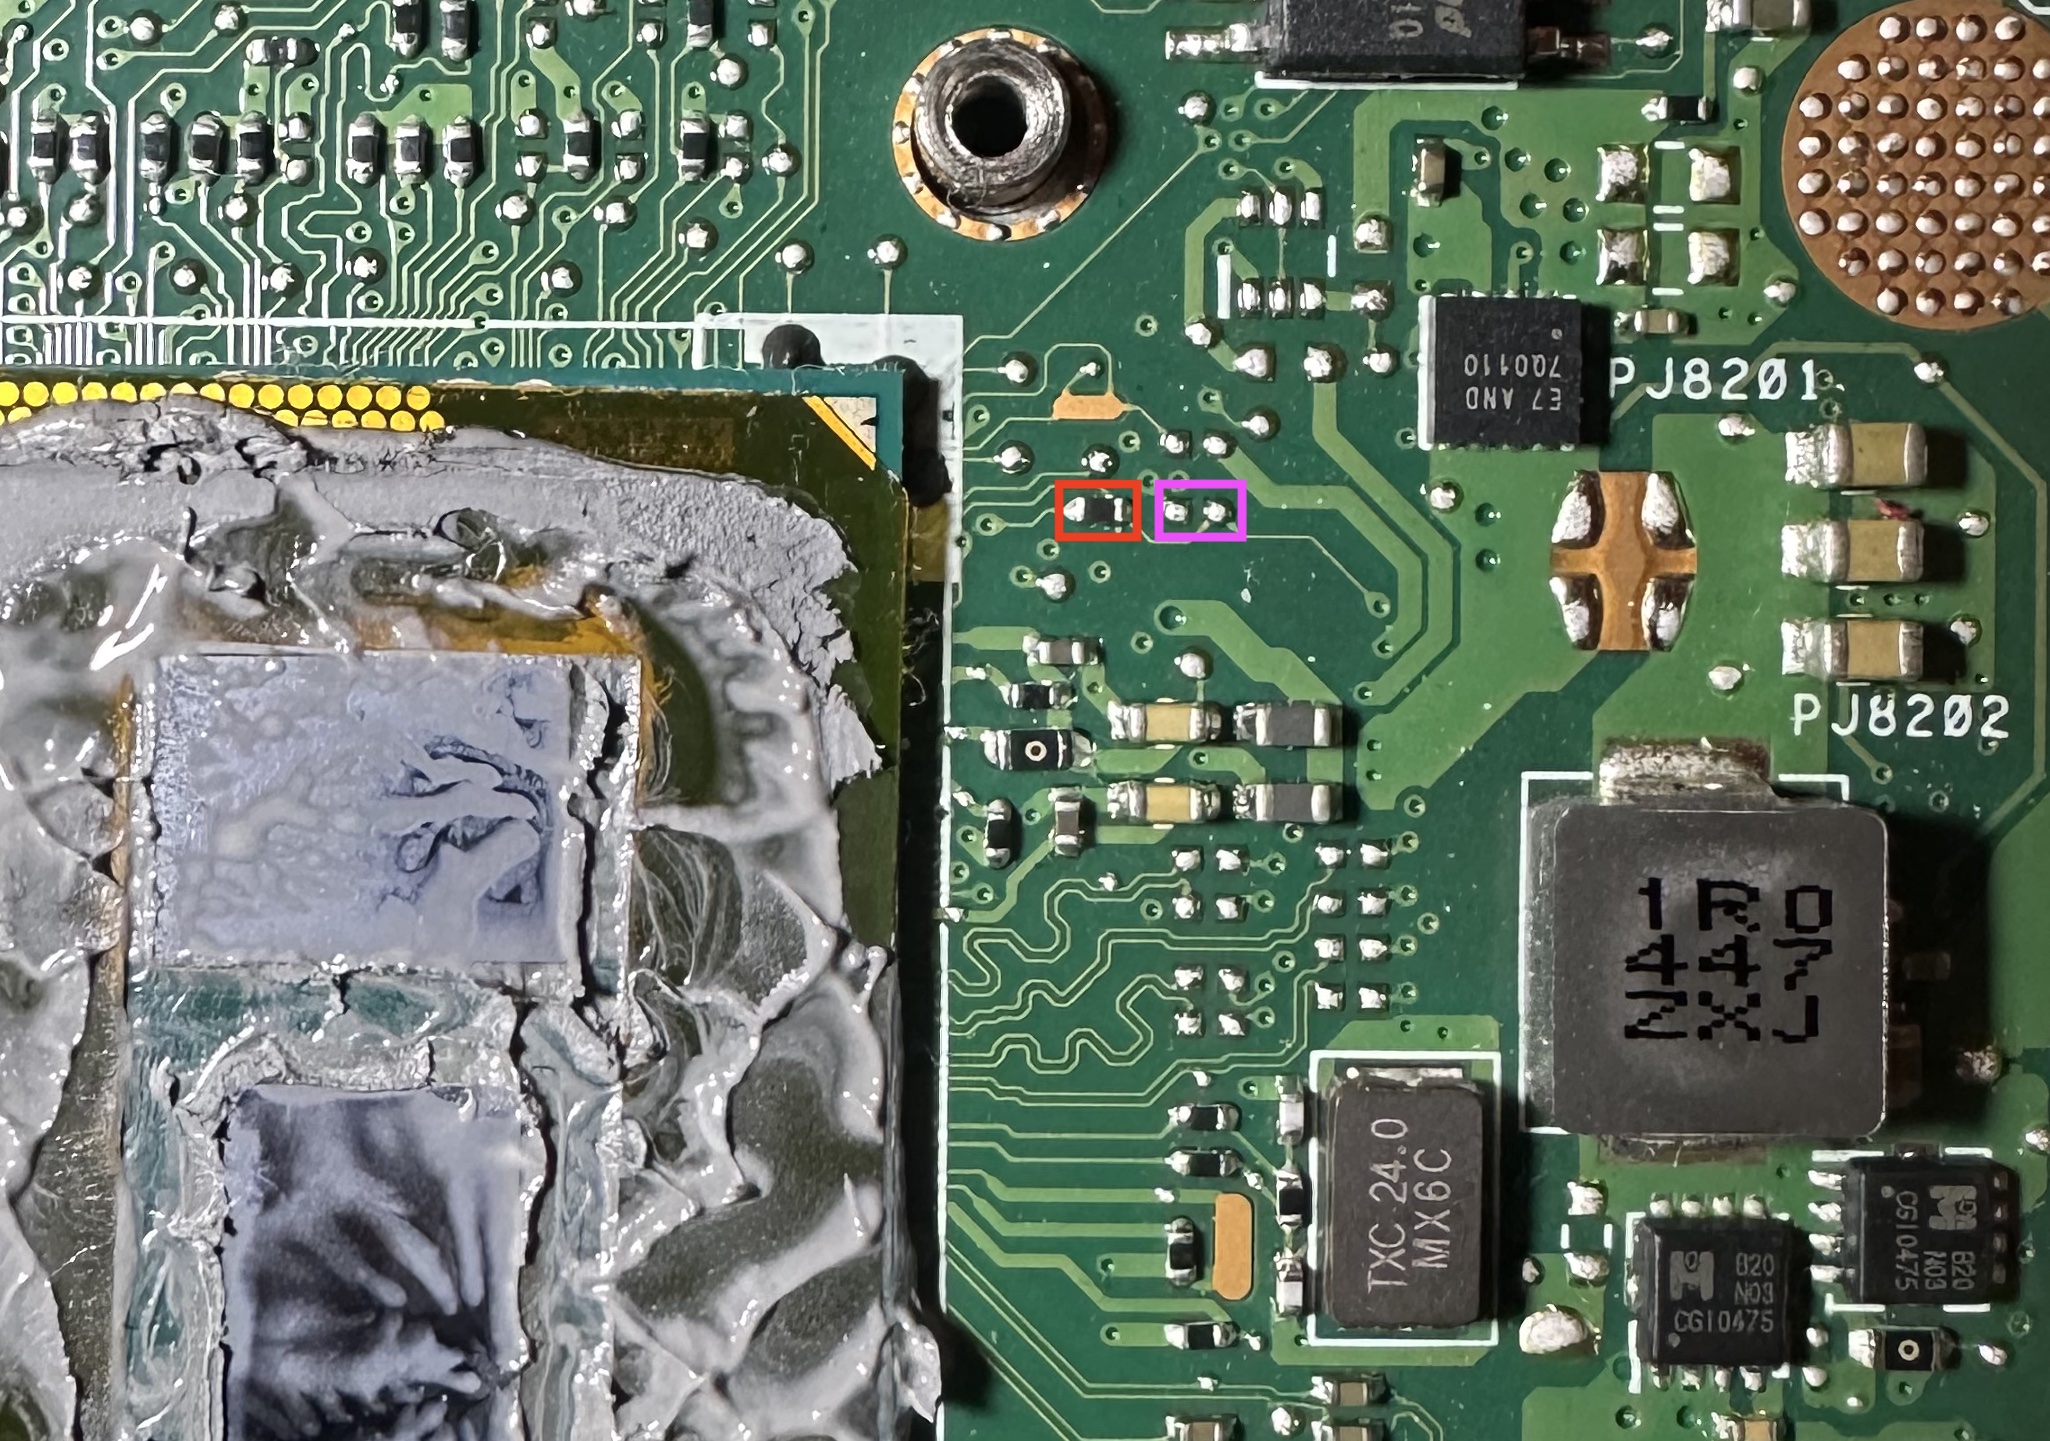
Once again the component outlined in red needs to be removed. The pads outlined in pink need to be bridged by a 0 Ohm 0402 SMD resistor. This will reroute the backlight control to the new correct pin on the display connector.
Finally, the area should look like this:
The last remaining area of interest is on the bottom of the motherboard near the ethernet and power connectors.
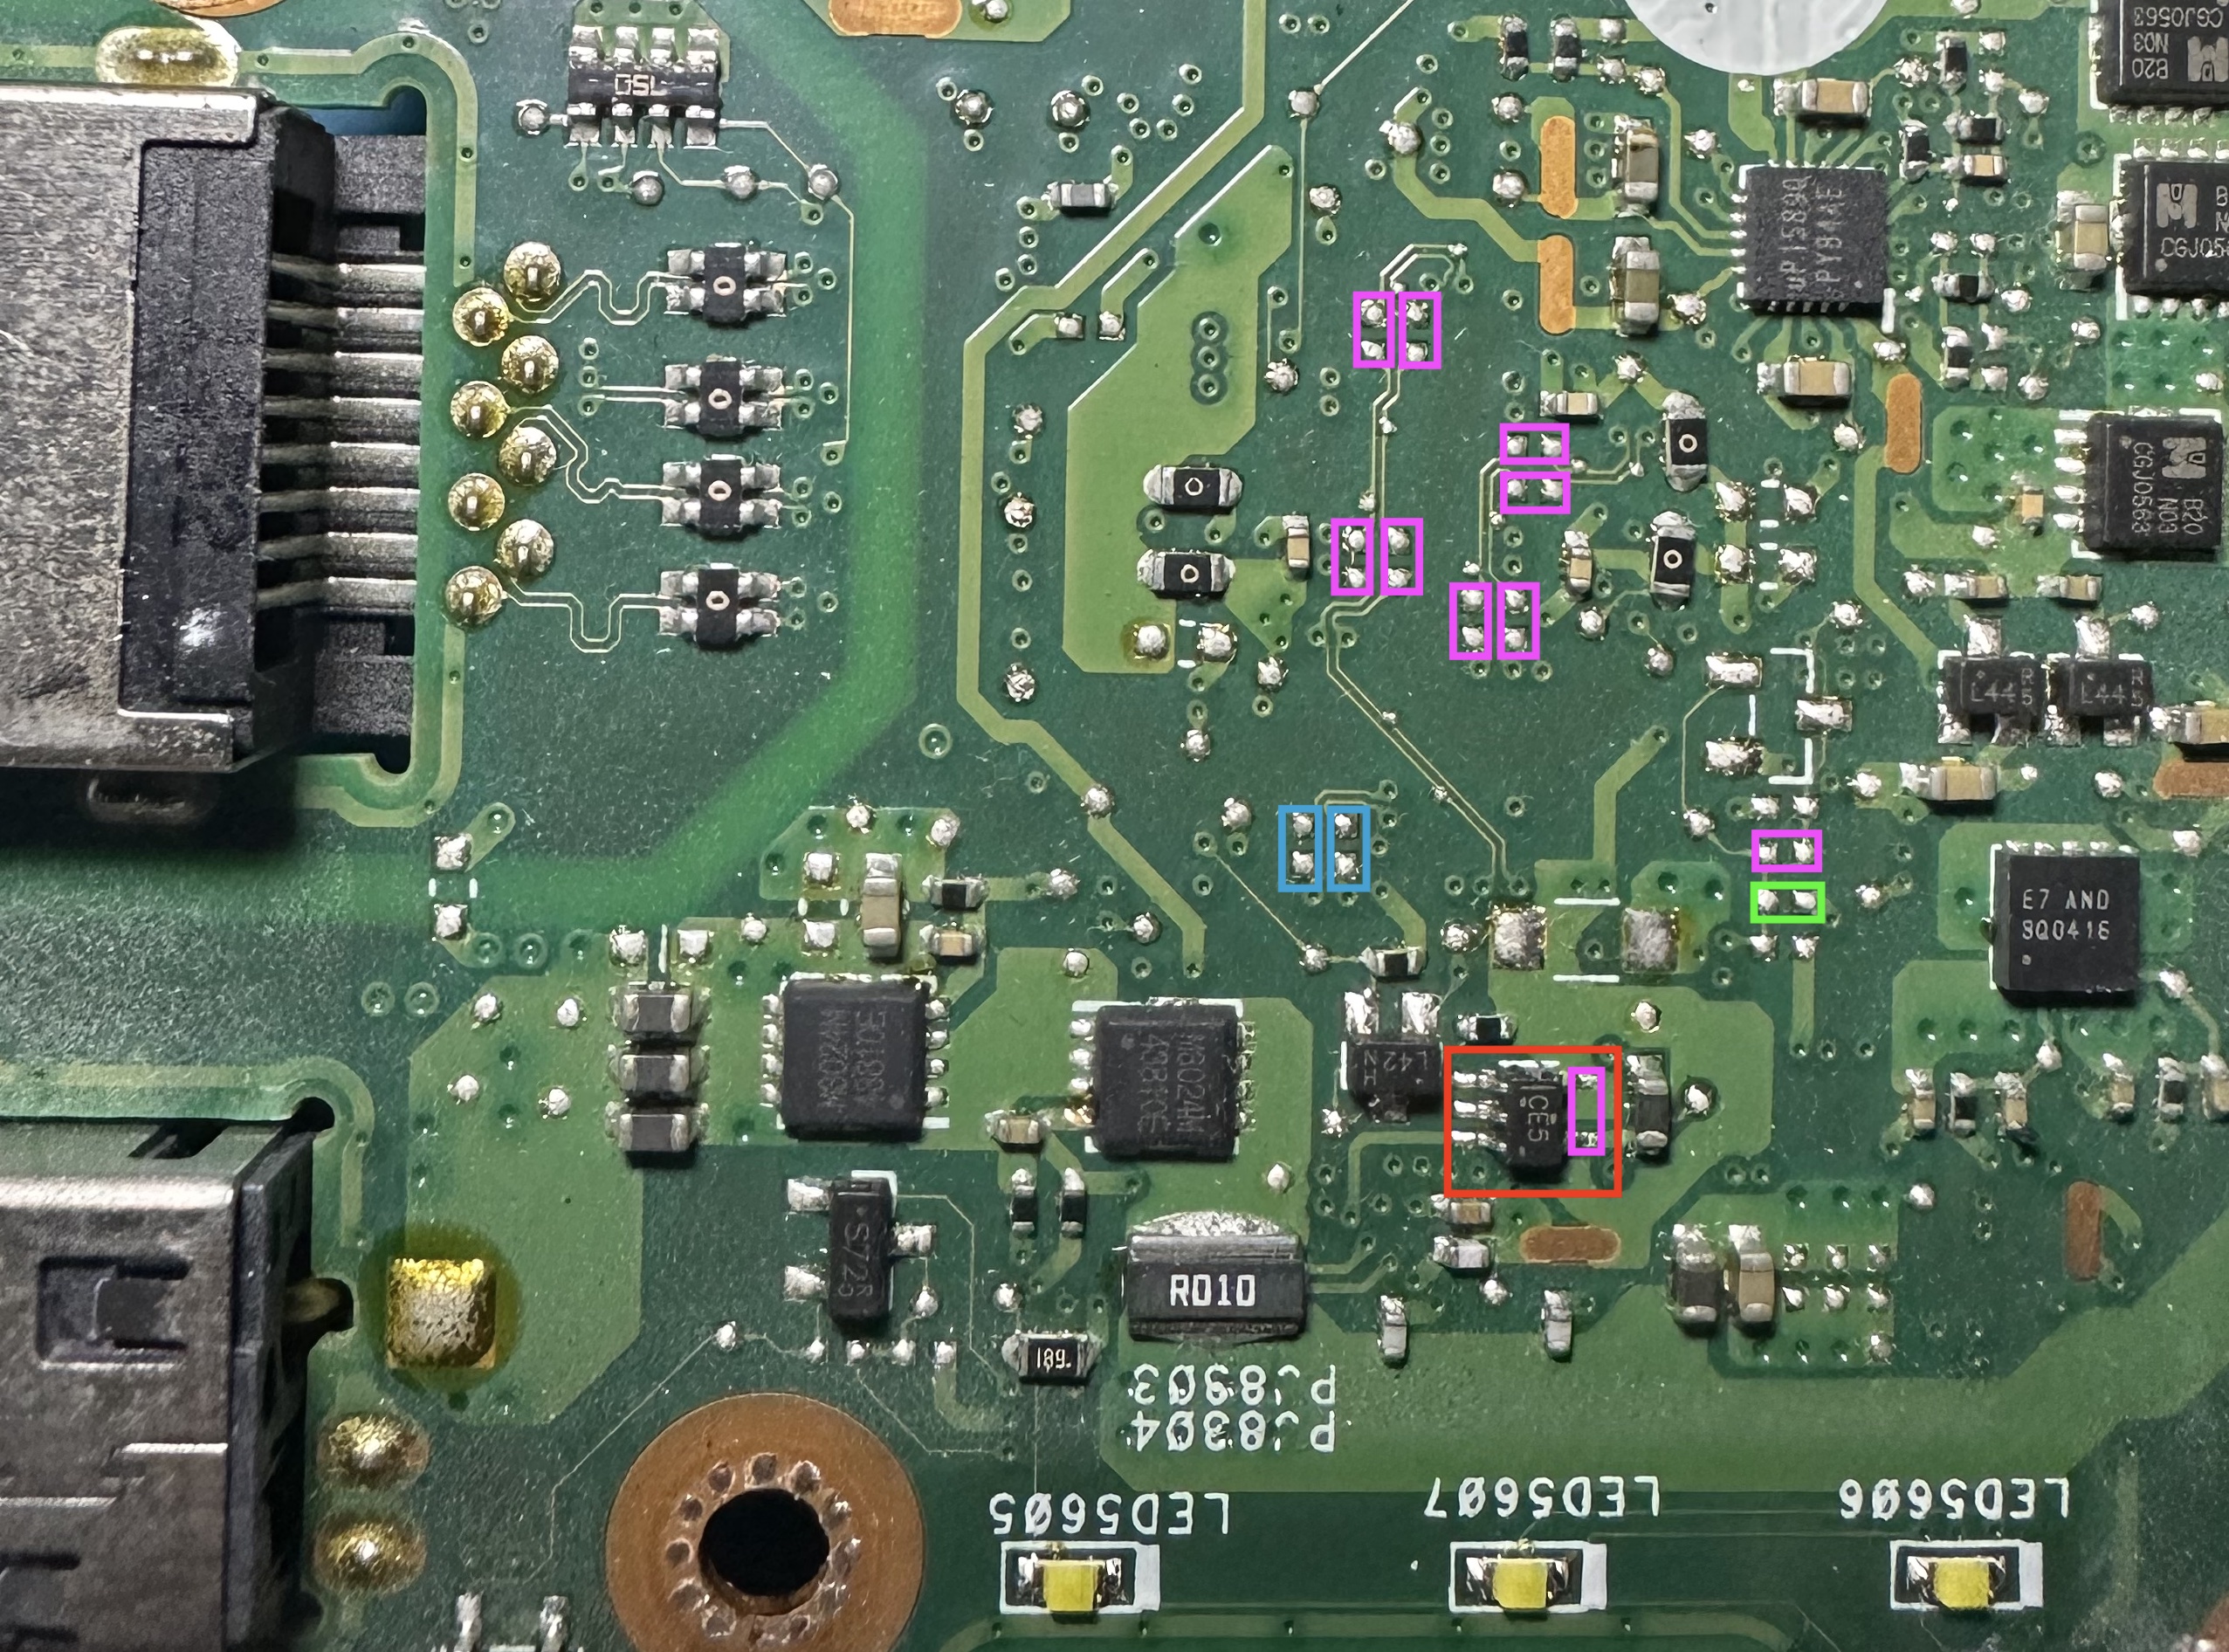
All pads outlined in pink need to be bridged with a 0 Ohm 0402 SMD resistor to bridge the old LVDS chip. The component outlined in red is an AND-Gate and has to be removed. The output of the logic gate then gets bridged with a 0 Ohm 0402 SMD resistor (located inside the red outline) to enable the backlight. Both of the blue outlined pads must be populated with 100 nF 0402 SMD capacitors while the pads outlined in green need to be fitted with a 10k 0402 SMD resistor.
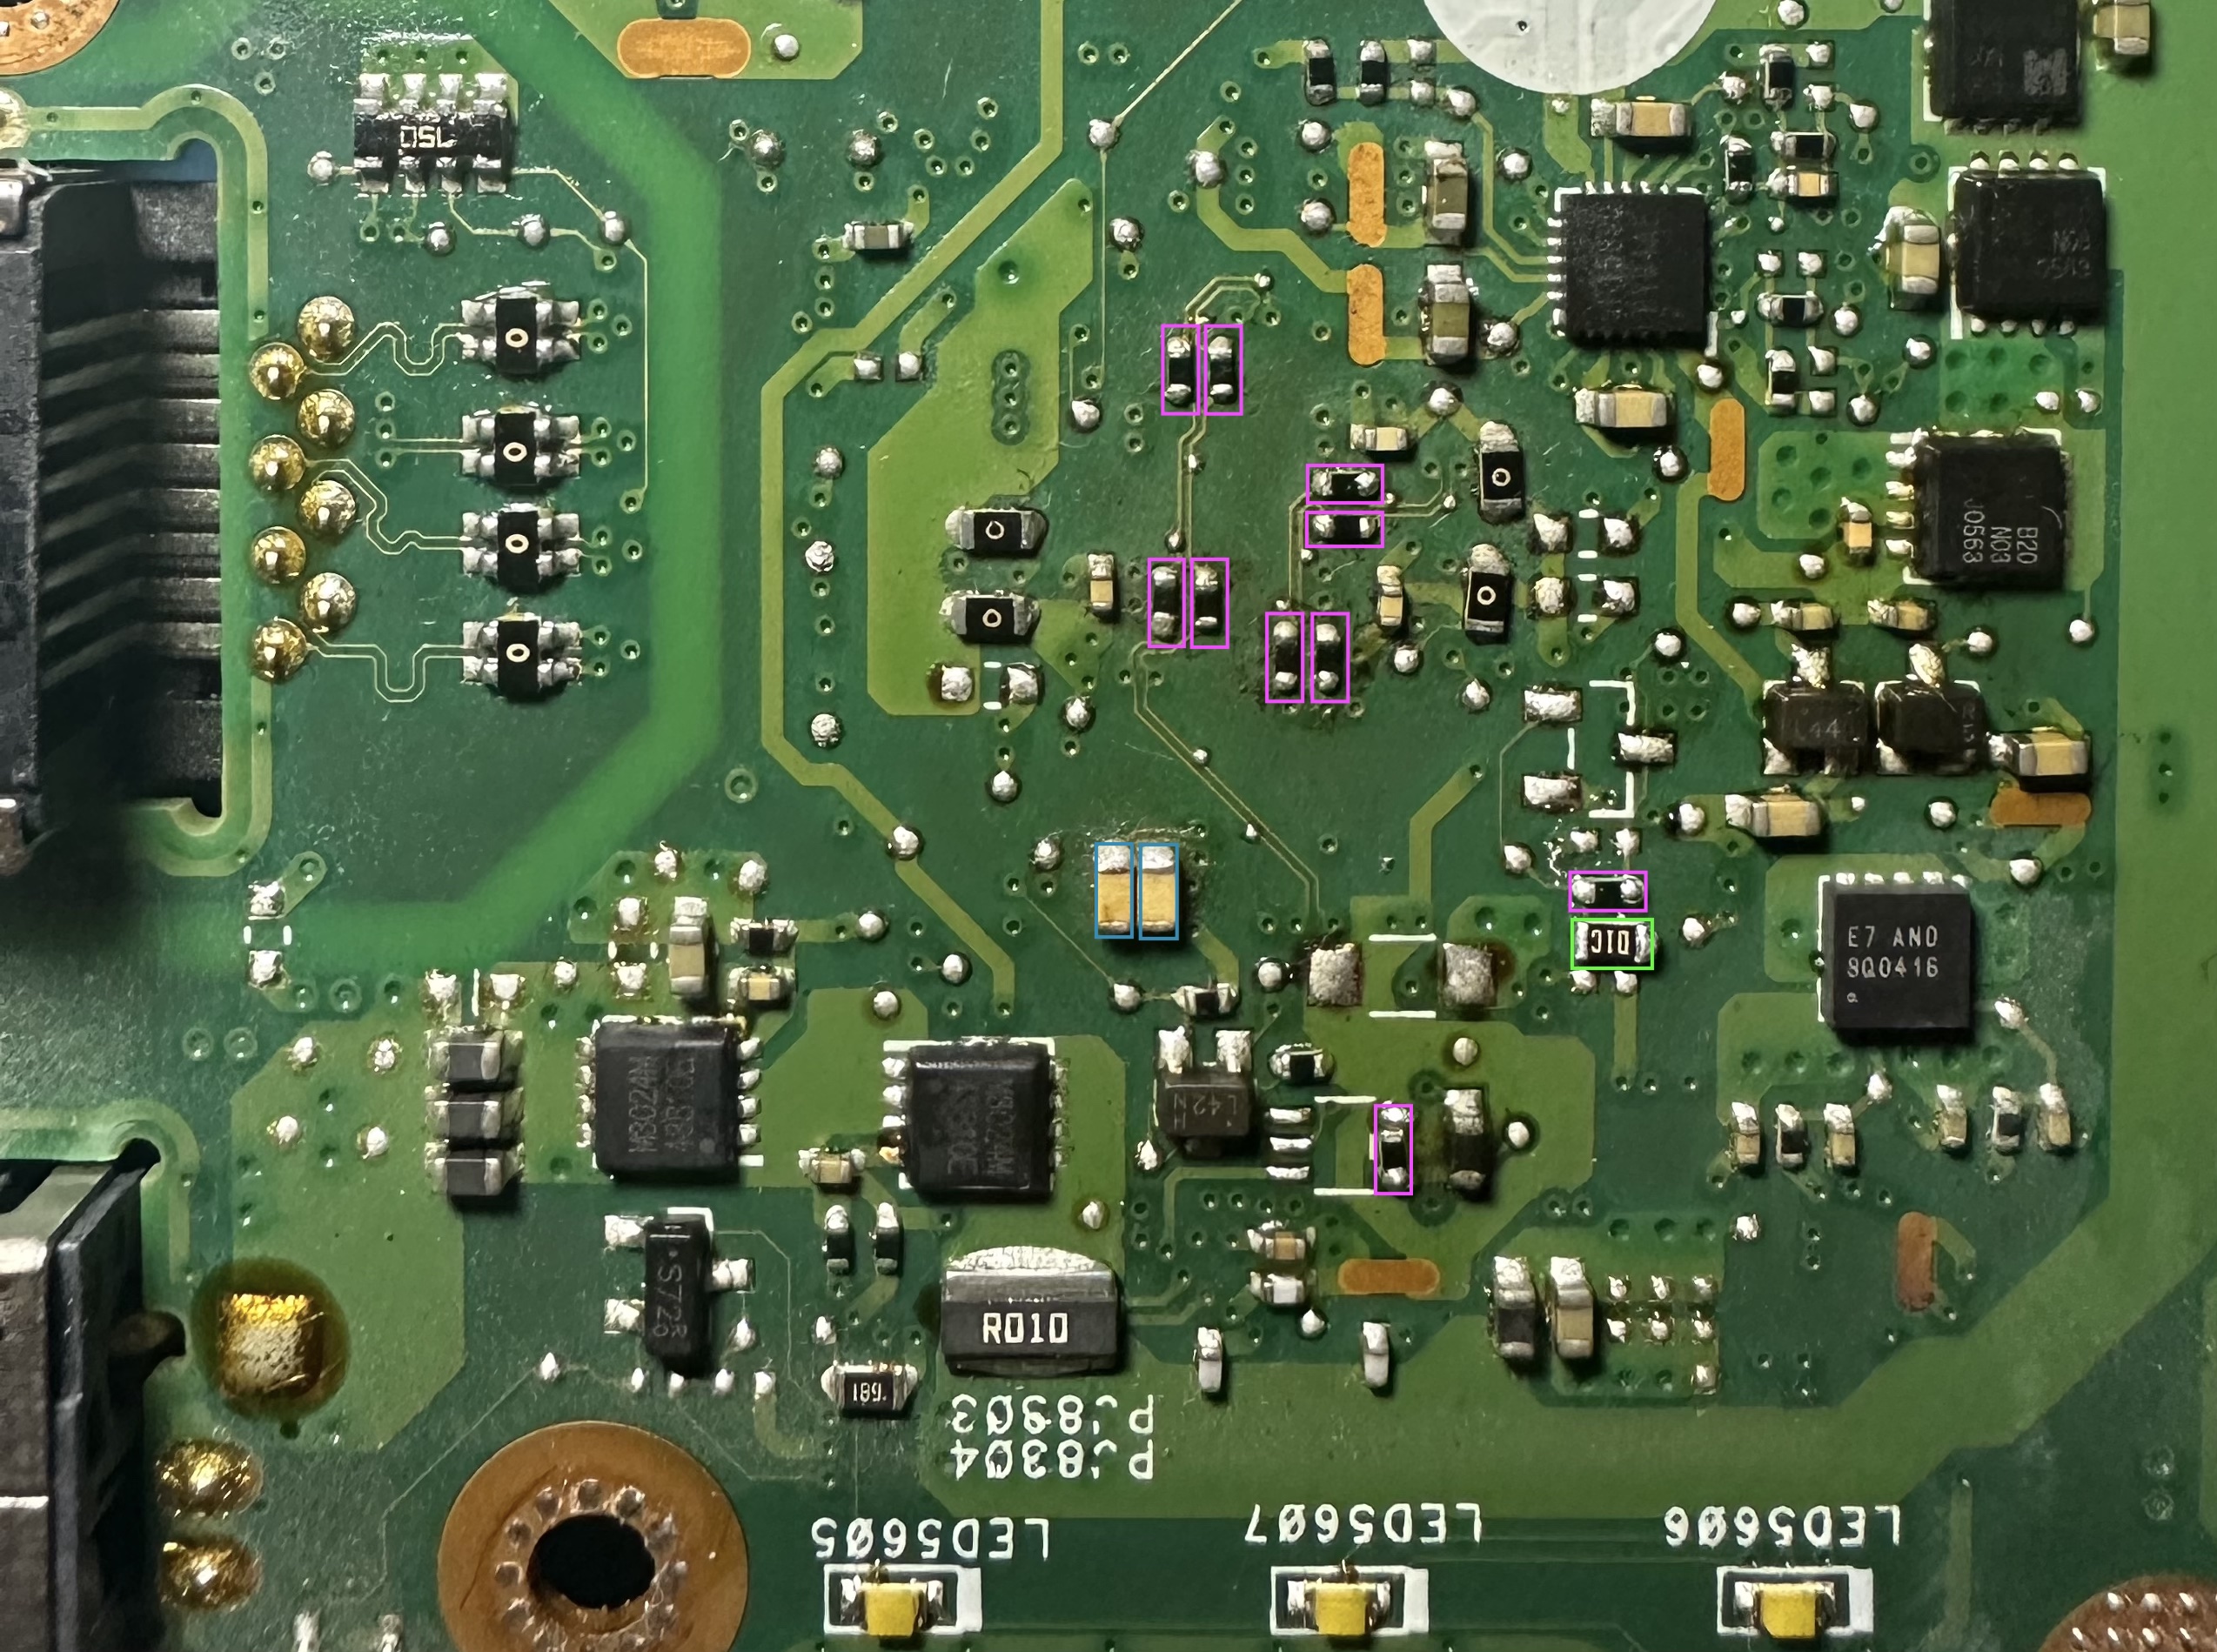
Finally, the area should look like this:
Once the new eDP display and 30 pin display cable have been installed the laptop may be reassambled and tested. If done correctly, the modification is now complete.
Conclusion
Despite not being a simple upgrade it is definitely worth upgrading this laptop to a better screen. After the upgrade the viewing angles on the new IPS display are excellent. The colours are no longer washed out, and both text and the user interface have become exceptionally clear and sharp in appearance. Even though this laptop is now 9 – 10 years old in 2023 it introduces a fresh breath of air making it feel more like a modern machine.
If you have any questions, please send an email to arved(at)m0kds.com
Current update: 11/2023